Showing posts with label favor. Show all posts

Tuesday, January 27, 2026

A Cottage Rose Valentine's Table

 Welcome to my Valentine Tablescape!  I have a cottage rose theme to celebrate the wonderful ladies in my neighborhood!

I am joining my dear tablescaping friends for a Valentine's Tablescape Hop.  We were all brought together by the wonderful Rita, of Panoply, to show off a table to celebrate the ones we love.

There will be links to 17 other tables at the end of my post! So grab a cup of coffee, sit back, and enjoy some loveliness!

Thursday, October 13, 2022

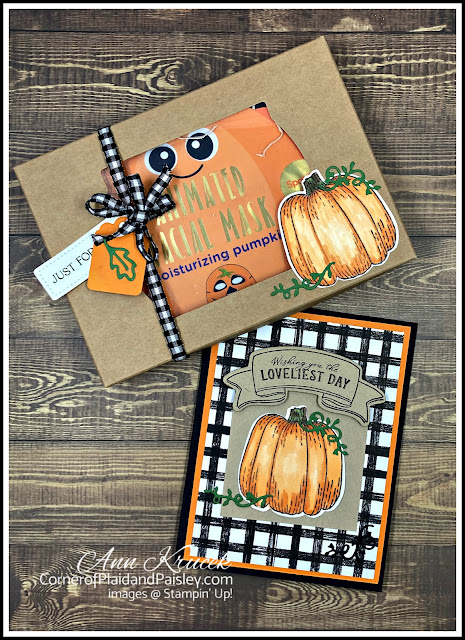
OSAT Pumpkin Spice Blog Hop - Hello Harvest Card and Gift Box

 Welcome to Plaid and Paisley where it is harvest time!

I am participating in the OSAT Blog hope were the theme is Pumpkin Spice Blog Hop.


We are to show a card and 3D creation that is anything Fall or Halloween.  The links to all of the other blog hop participants will be at the bottom of my post.

I thought I would give a nod to all the pumpkins that are grown in my home state of Ohio.

Tuesday, September 6, 2022

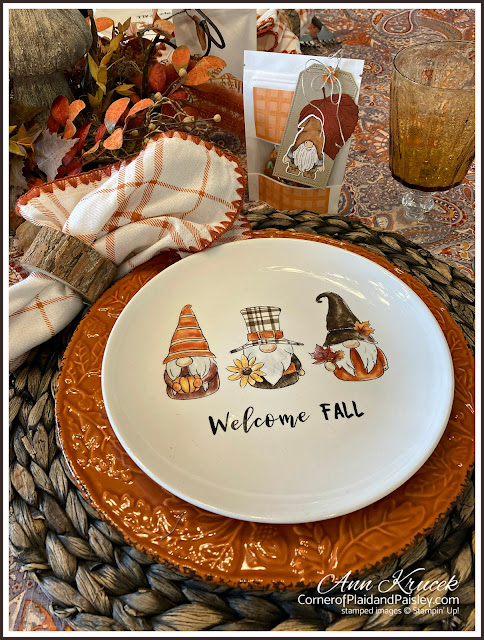
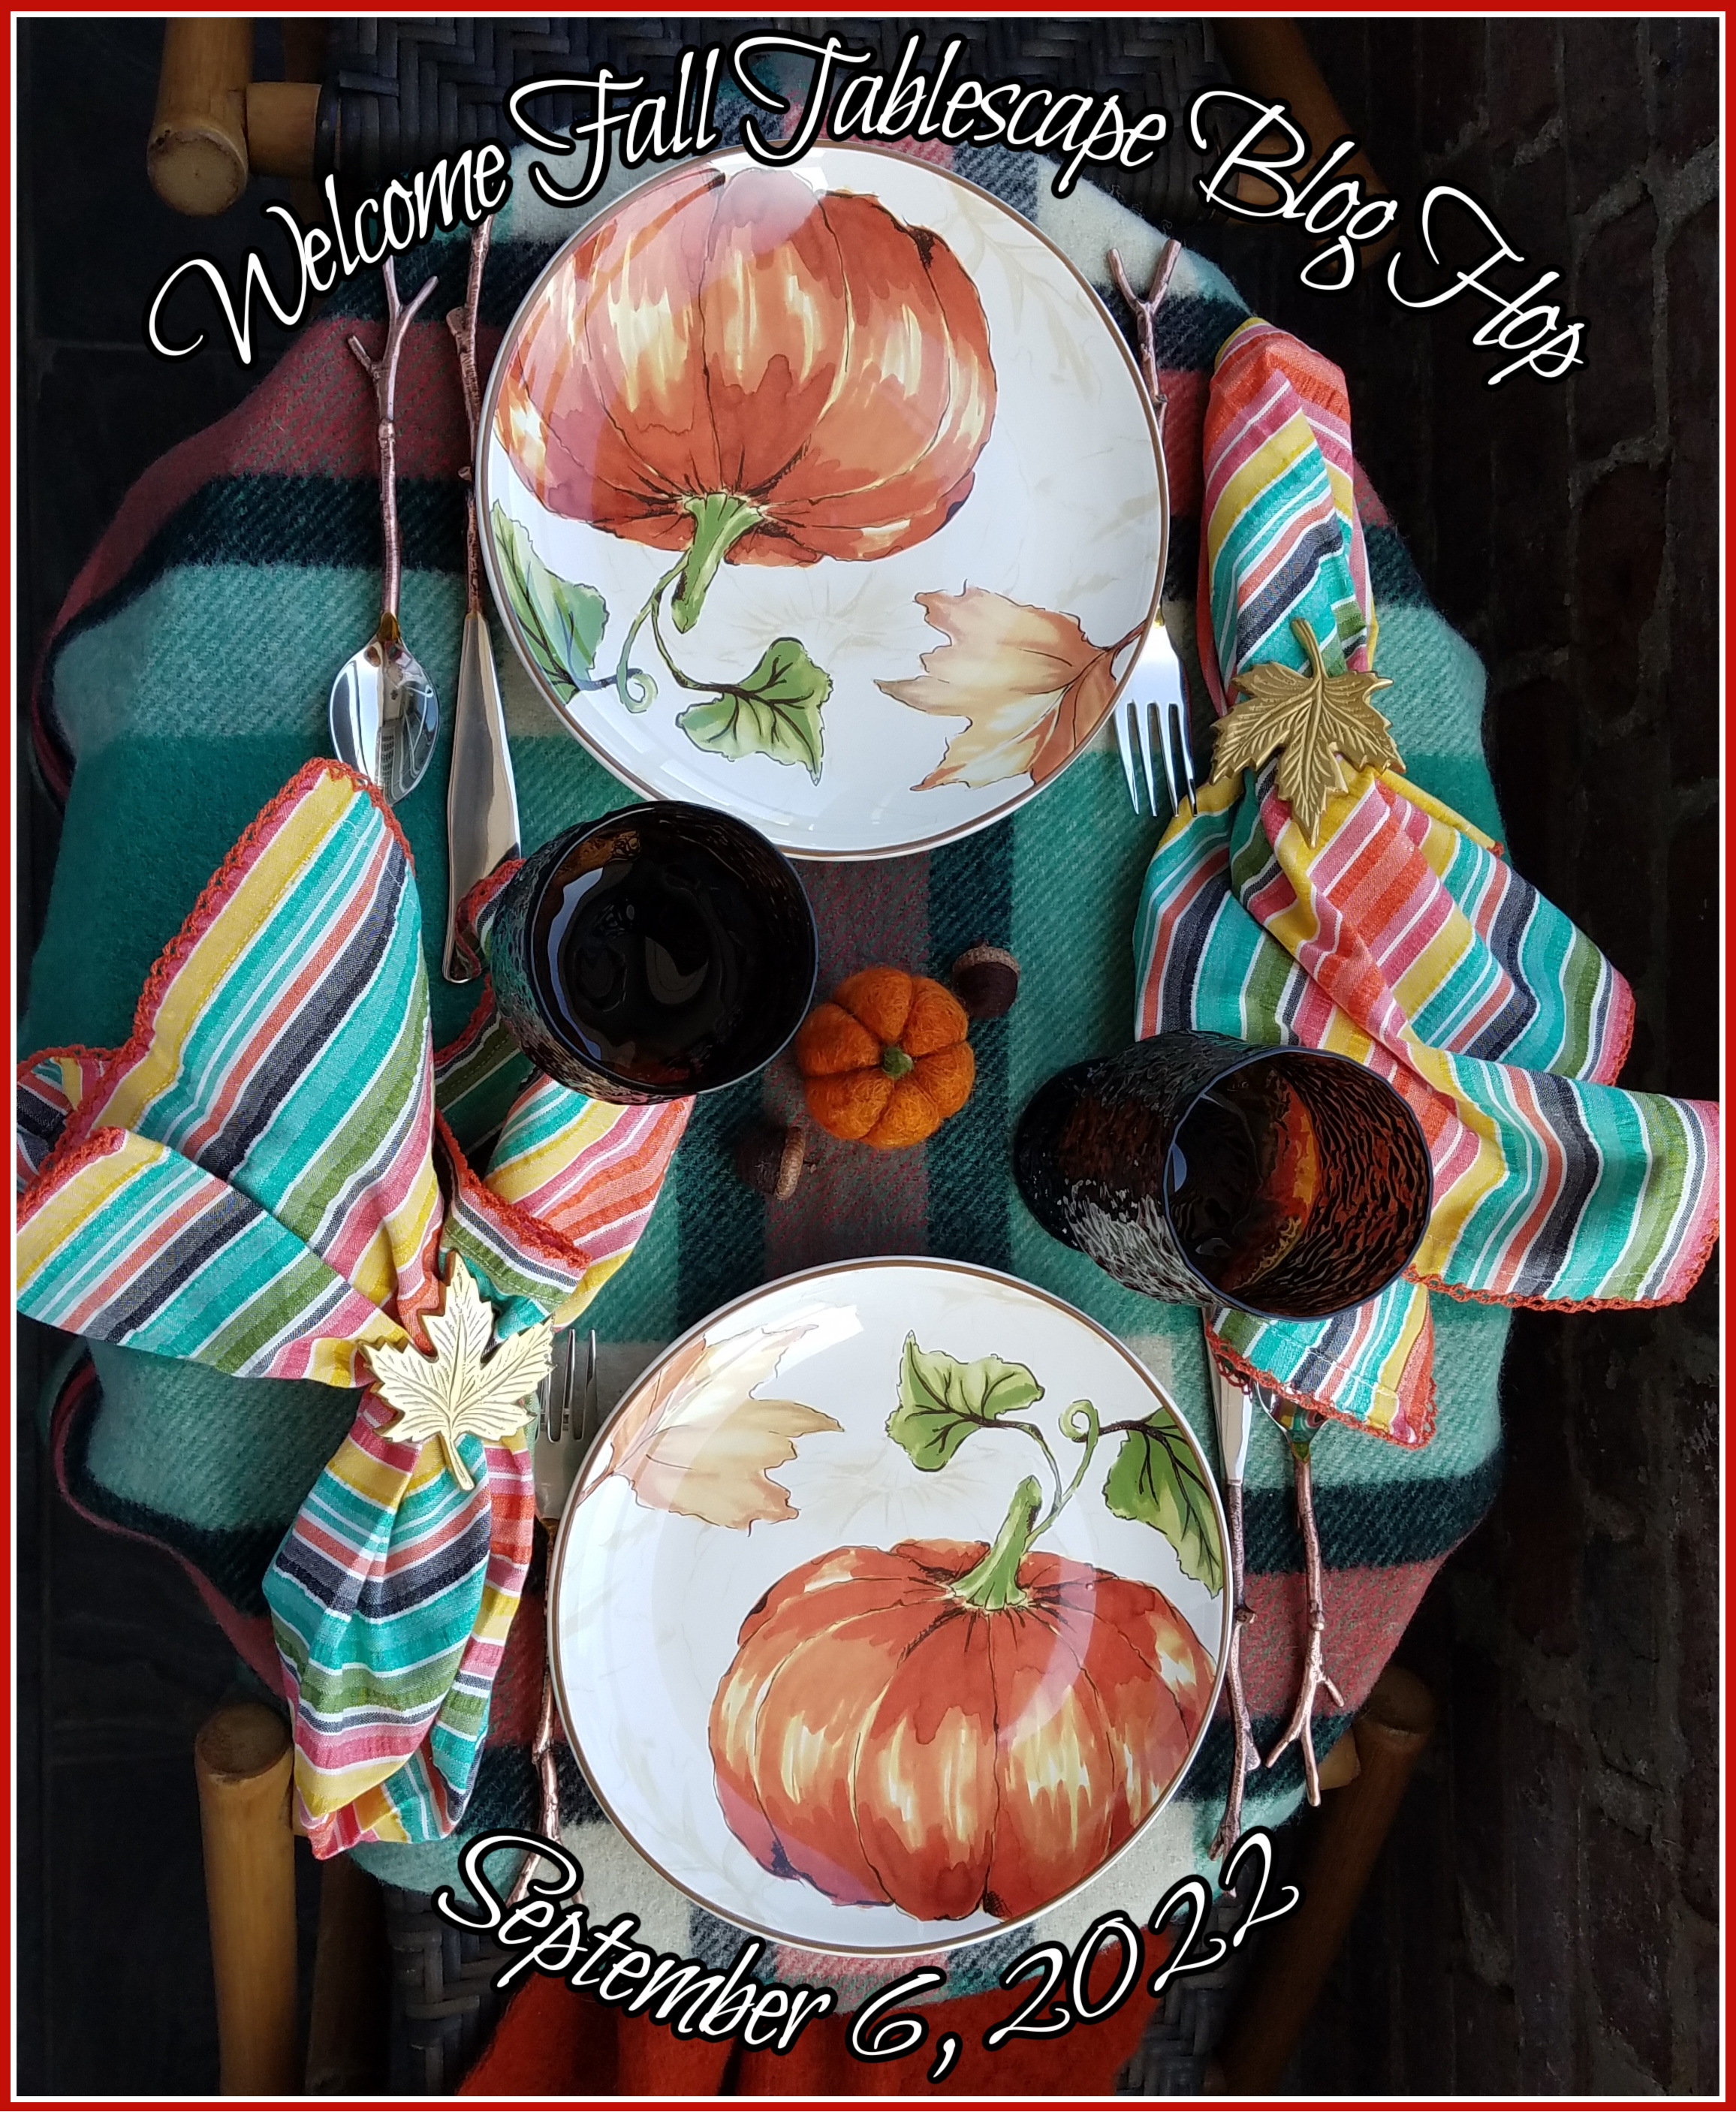
Fall Tablescape - Autumn Gnome - Blog Hop 2022

 Welcome to my fall table with my little Gnome friends!!

I am participating in the Fall Tablescape Blog Hop hosted by Rita from Panoply.

All of the links to the other talented table stylists will be at the end of this post for you to get lots of fall inspiration from!
🍁🍂🍁🍂🍁🍂🍁🍂
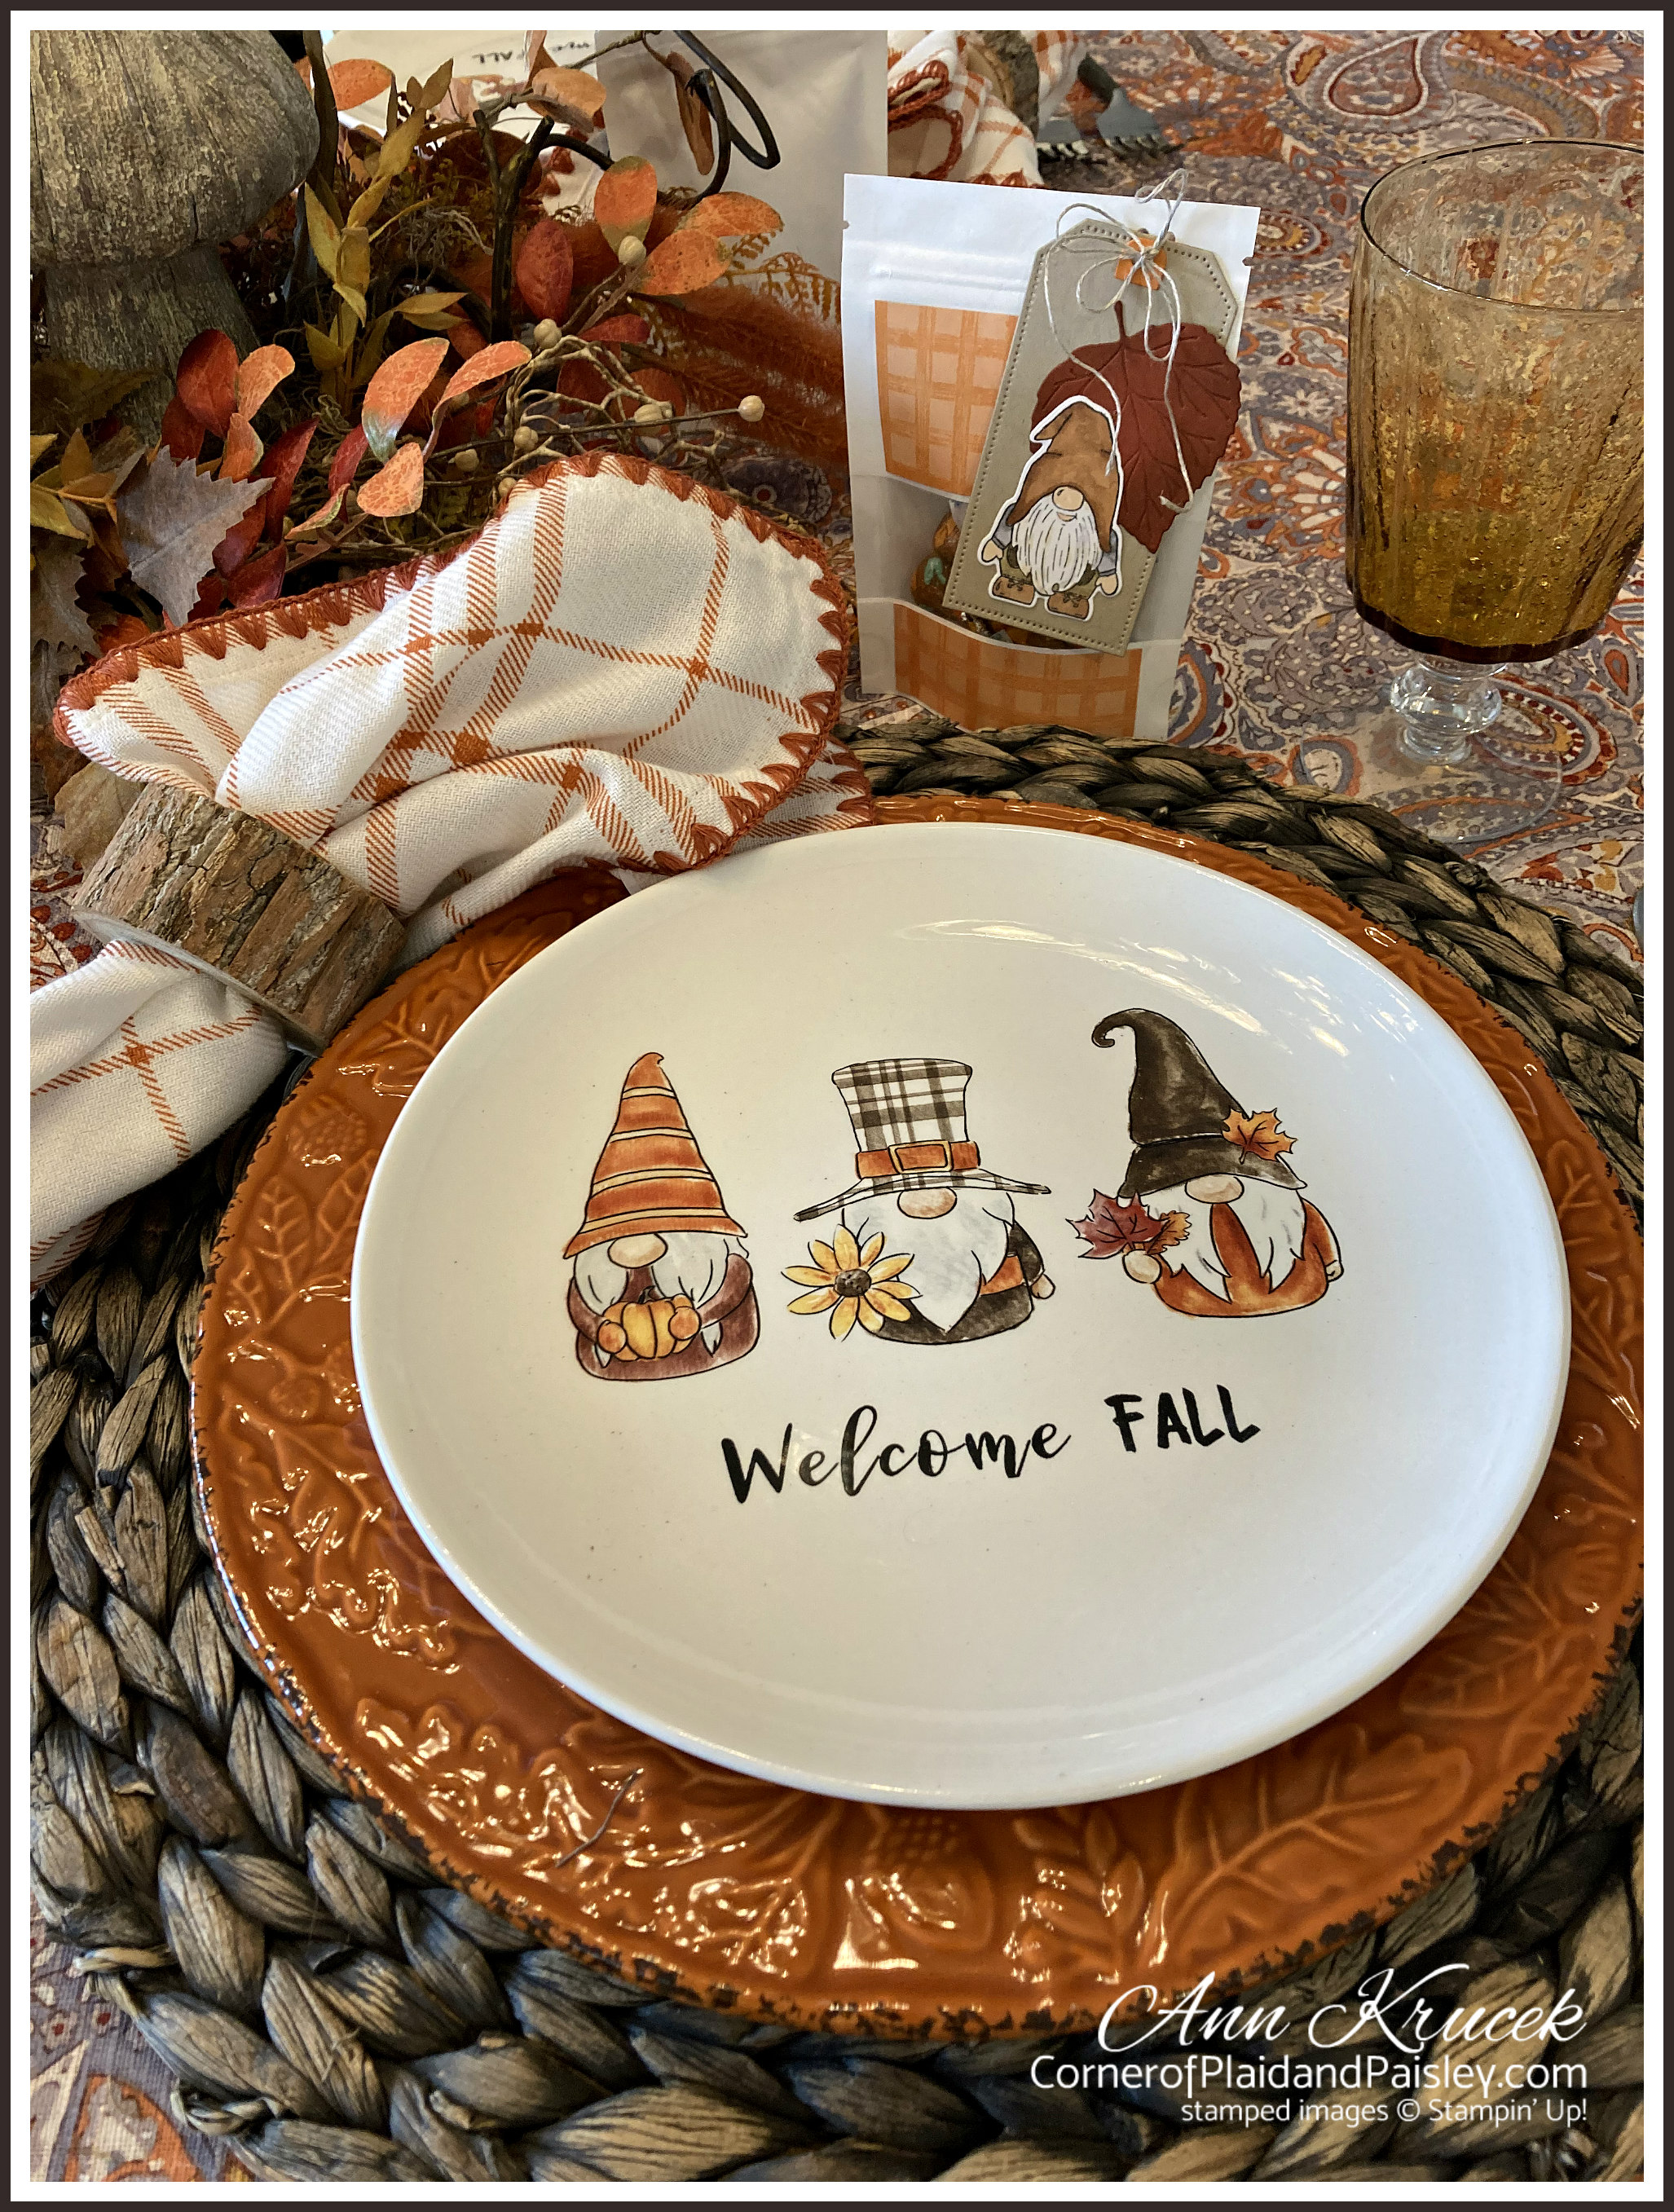
 I wanted to do a table with lots of autumn colors since we put on a beautiful foliage show every fall, here in Ohio.  I must have been in a quirky mood on my trip into Hobby Lobby when I picked up these cute little Gnome plates. Just so you know - I truly am not a huge gnome lover and do not have gnomes all over my house!!   
But these plates do make me smile!!  And I had just purchased a new gnome stamp set from Stampin' Up! and I just thought that these would be perfect for each other, so in the cart they went.  
I pulled out one of my favorite paisley tablecloths, full of yellows, oranges and rusts with a grey base to use with these fun plates.  Next out of my stash was the very textured dyed seagrass placemats.

The orange/rust textured border plates I purchased this year along with the Gnome plates at Hobby Lobby.
The twig flatware has been around for a while, I believe these are from World Market about 8 to 9 years ago. The napkins were purchased at my favorite store in Amish Country - called the Peddler.  They were having a 50% off of all linens a couple of weeks ago - I didn't even have the plates yet - but with my love for plaids, I knew I would be able to put them to good use! 
I gathered up my bark candles, mushrooms (which I used previously - here) and a mish mash of old faux fall foliage and two little gnome candles I picked up at HomeGoods last week.  After fiddling around with them for a bit I came up with this arrangement in an old bark tray for my centerpiece.

As I mentioned above, I had just purchased the Kindest Gnomes stamp and die set from Stampin' Up! so I made some little favors to go with the place settings.
I used the Peekaboo Treat Bags, and the Gingham Cottage paper for my favors.
I decorated my tags with some gnomes that I colored with my Stampin' Blends and added a sunflower for the girl gnome and a leaf for my boy gnome.  These are just big enough to fit about 8 Hershey Kisses and have a gusseted bottom so that they stand on their own.


This table was all about the colors and the leaves to honor our beautiful seasonal nature show when all the trees start changing colors here.  It is my favorite time of the year - when things start to cool down, the air is crisp, the smell of campfires and s'mores linger and the talk of football stirs the conversations! So I tried to carry some of that through to my sideboard as well.

As promised, here are all the links to more Fall Tablescapes for you to enjoy!
I hope you can find sometime to sit and relax and enjoy looking at each of these tables and get lots of inspiration for your fall decorating.


Me and My Captain - Shine On Harvest Moon
Home is Where the Boat Is - Cusp of Fall with Woodland Friends
Hyacinths for the Soul - Whoooo is Ready for Autumn?
The Painted Apron - Early Fall Pumpkin Patch
From My Carolina Home - Autumn Apples Tablescape
Celebrate and Decorate - A Fall Tablescape in Shades of Blue
Living With Thanksgiving - Fall Vibes
Dinner at Eight - Mums Lead the Way to Fall
Thrifting Wonderland - It's Time for a Fall Tablescape
The Bookish Dilettante - Back to (Art) School
Life and Linda - Welcome Fall
Corner of Plaid and Paisley - Fall Tablescape - Autumn Gnome
Red Cottage Chronicles - Cozy Up Around an Autumn Dinner Table
🍁🍂🍁🍂🍁🍂🍁🍂
I hope you enjoyed my fall table and favors.
Wishing you a wonderful Autumn Season!


Thursday, July 14, 2022

OSAT Time to Saleabrate - Christmas in July

 Welcome to more Christmas in July here at Corner of Plaid and Paisley!

Today I am participating in the OSAT Time to Celebrate Blog Hop!

Which means I was challenged to do a card and a 3d item with the current Sale-abration items for this month's theme.

I am using two different Sale-abration items with both my card and my tea light box.

Saturday, July 10, 2021

Christmas in July - Stamping INKspirations Blog Hop

Happiness is homemade Christmas Cookies, even if this is July!?!

Here is a great little gift idea to make for your favorite baker!!

This is all part of Christmas in July with the Stamping Inkspirations Blog Hop.

Monday, June 29, 2020

Paper Piecing Quilt Stars Treat Tote and Card

Here is a fun way to add some red, white and blue touches to your home for the 4th with some paper pieced quilt stars!
 I have had several requests for the directions on my Patriotic Treat Totes from my last tablescape.

Plus I made  a card version for those who can't make it to your home this year.
💙💙💙☆💙
Here are the Tote directions:
  •  Cut  one 10 1/4" X 5" for base, one 3/4" X 11"strip and one 3/8" X 11" strip for handle.
  • Score the base at 3 1/2", 5", 8 1/2" and at 10" on the long side  -which will be your sides
  • Score at 1 1/2" on the short side - for the bottom
  • Cut on the score lines up to the fold line for your bottom flaps and cut out the one corner piece - see this photo I have with those directions.
  • Stamp and Cut 32 of the smallest triangle from The Right Triangle Bundle.  I would suggest finding a quilt pattern that you like on Pinterest and copying that with your colors and layout of the quilt block you would like to create. I stamped a couple of different patterns out with both Read Red and     - for the pattern I chose, I also cut plain white triangles as well.
  • Layout your triangles on the second large square on your scored base piece.  This can be very tedious, just remember 2 pieces of the triangles long sides together form a block - if you follow the block pattern - it is a bit easier to layout your pattern.  I used liquid adhesive to glue down all of my squares so that I could shift them into place and get them as straight as possible.
  • Once your quilt square is finished, then build your tote simply by folding each side to form a box, then fold your back bottom flap down first, then the bottom side flaps in, and lastly your front flap down so that your the front of your tote has a nice smooth finish.  Once you have all of your folds made and see how it goes together than you can put some glue or score tape down along the 1/4" side flap and stick it so that the sides of your box are complete and then work on adhering the bottom flaps together.  I always like to see how the whole thing comes together before I use any adhesive!!
  • Now for the handle.  Adhere the smaller strip down the middle of the bigger strip.
  • Once the stripe is adhered - take your bone folder and run it along the handle to condition your paper to curve a bit for a nice smooth handle.  
  • Attached the handle using liquid glue about 1 1/4"  from the bottom of the bag and the same on the opposite side.


💙💙💙☆💙
The square in the middle of the wood here was made the same way, only with the next size up of the triangle in The Right Triangle Bundle.
If you like quilting or putting together puzzles you will really like playing with this and making all sorts of patterns - like the pinwheel version on the left.
💙💙💙☆💙
Now on to the card version of this paper piecing quilt project!


  • Basic card base - 8 1/2"  X 5 1/2" , scored at 4 1/4" and folded in half- mine is in Night of Navy.
  • Whisper White cardstock 4" X 4 "  Run through the new Dainty Diamonds 3D embossing folder
  • Real Red cardstock 2" X 4" Run through the the same Dainty Diamonds 3D embossing folder
  • Adhere the white embossed piece to the red embossed piece by overlapping by 3/4" so that your finished piece is 5 1/4" long.
  • Add some ribbon across the width over the line where the two papers meet and adhere the ends to the back using Stampin' Seal.  The ribbon I used is from the Boho Indigo Product medley - Night of Navy 1/2" frayed Grosgrain Ribbon but the Denim Ribbon would look just as good.
  • Cut a Red square 3 1/4" X 3 1/4" for you quilt block background.
  • It takes 32 small triangles to make a  block to fit this square.  Stamp and cut these in a variety of colors and patterns with The Right Triangle Bundle - using the smallest triangle - again, the easiest way I found to do this was to make a quilt square was to find a quilt I liked on Pinterest and copy the quilt by breaking it down to smaller squares.  Once I found that the two long sides of the triangles had to to together to form this pattern, it was much easier.  Like above, I used liquid glue to adhere all of the triangles so I could adjust them as I laid each on into place.
  • I adhered the red backed quilt square to the red and white piece and then the red and white piece with the ribbon to the navy card base.
  • Using the Celebrate Sunflowers, I put washi tape over the word you in the sentiment - Let's celebrate you and inked it up with the tape on - took the tape off then and stamped the sentiment so that I only got Let's celebrate.  
  • I cut the sentiment out with a die from the All Dressed Up Dies and adhered it with dimensionals.
  • Lastly, I added two red rhinestones for a little flair!

💙💙💙☆💙
Stampin' Up! will be celebrating Bonus Days in the Month of July.  So starting July 1st for every $50 you spend (not counting tax and shipping) you will get a $5 coupon to be redeemed in August.

So if there is something you have had your eye on in the new catalog, this will be the time to order so you can take advantage of this promotion! 

Have a wonderful 4th of July!!


Tuesday, June 23, 2020

Red White and Blue Patriotic Tablescape

Welcome to my 4th of July Table!
I am joining my talented friends for a Patriotic Tablescape Blog Hop.
Thank you to Chloe and Andrea for pulling us all together for this spectacular display of pride for our countries.
We will have lots of inspiration for your holiday fun and all the links will be at the bottom of my post.
 I got the inspiration for my table from some beautiful patriotic quilts I had seen on Pinterest.  While I am a sewer and love fabric, I have never been much of a quilter - mostly because of the time.  There are only so many hobbies(and money) a girl can have!!  So while I did not sew anything for this table,  I tried to choose from the dishes I had on hand, some that reminded me of fabric in old quilts.
 I made some  paper pieced quilt like designs for my little favor totes bags!
 I used the new Stampin' Up! The Right Triangle Bundle for these little star and pinwheel quilt designs on the little tote boxes. I stamped and cut a million little triangles and had fun piecing them all together in different quilt block designs - I think glue is a bit easier than if I had had to sew them all together!!  I also made a larger pieced project for the center of my wood frame wall art on the mantel.
This pitcher filled with waving flags was a must on the table since the design has a quilt square look to it.
I love this red tray because it reminds me of a little red wagon!  
We normally have a huge shindig here over the 4th because our little lake usually has such a spectacular fireworks show.  Unfortunately - that has been pushed back to Labor Day Weekend if all goes well with the pandemic numbers in this area.  We have scaled back out party to just include our immediate family - but I am thrilled to have them over and spend some time with them! 

 Now, as promised - here are all of the links to some wonderful table stylists, showing off each of their patriotic tables.  Have fun looking through all of them!!

☆☆☆☆☆☆☆☆☆☆

Corner of Plaid and Paisley  ** You are HERE!

☆☆☆☆☆☆☆☆☆☆
I hope you enjoyed my Patriotic Table


and I hope you are able to celebrate pride for your country, even in the difficult times. I pray that we all can all be a kinder and gentler people.


Tuesday, February 4, 2020

Valentine Tablescape

Valentine's Day is a great day to tell the people who are something special in your life just that-
That they are special!  

I am participating in Chloe Crabtree's Valentine Tablescape Blog Hop with this post.
For those of you who have joined us in the past - we used to do a week long hop.  We have changed things up a bit and all of the blogs will be listed at the same time and you can browse all you want through the links that are listed near the bottom of this post.


I am dedicating my Valentine's table to the three ladies that mean the most to me:
My sister, my daughter and my daughter-in-law.
We try to get together several times a year to do some family traditions together such as make apple sauce and bake cookies together.  When we get together, there is a lot of chatter and much laughing!!
So I wanted to set a fun, cheerful table for these ladies who brighten my life.
We are more of a casual group, not too high maintenance! So no tablecloth and a more relaxed setting.
I added a little purse at each place setting that is toting some dark chocolates!
These adorable little purses were made with Stampin' Up! All Dressed Up Dies
I also stamped out some hearts and added some ribbon to my basic white napkin rings to dress them up with a bit more love.
  I used faux tulip pots on the table - roses just seemed to formal - these just looked like more fun.
❤❤❤❤❤❤❤❤❤❤❤❤❤❤❤❤❤❤
Speaking of fun!  Here are the links to all of the wonderful, talented ladies who are participating in the Valentine Tablescape Hop.  There is tons of inspiration and beautiful images to take in, better than looking at the magazines while standing in line at the grocery store!! So please check out the other blogger's fabulous tables:

❤❤❤❤❤❤❤❤❤❤❤❤❤❤❤❤❤❤
I made some punch heart garlands and added them to my mantle decor along with some mini topiaries.
I hope you enjoyed my table and that 
you are able to spread some love to those who are special to you this 
Valentine's Day!
❤❤❤❤❤❤❤❤❤
Sources:
Placemats - years ago at Elder Beerman - now out of business
White Chargers - years ago at Olde Time Pottery
Red Polka dot plates - Hobby Lobby last spring at 50% off
Red plaid border plates - bought a couple weeks ago on clearance at Sur La Table
Red heart plate -  years ago on clearance at Michaels
Flatware - many years ago- HomeGoods
Napkins - both check and white with red stitching - Pier 1 quite a few years ago
Faux Tulips - last week at Dutch Valley Gift Barn, Sugar Creek, Ohio
Ribbon and papergoods - Stampin' Up! - shop right here!
❤❤❤❤❤❤❤❤❤

Tuesday, January 7, 2020

Dressed to Impress Cards and Purse

I have been playing with the Dressed to Impress Bundle from the new Stampin' Up! January-June Mini Catalog to start off the new year.
There are so many cute things in this new catalog!! So this is just the first of many cute things to follow!  Plus- Salabration is happening!!  Which means free items with every $50 purchase!!
🎉🎈🎉🎈🎉
This Best Dressed Suite of products has some beautiful Designer series paper with soft florals and some stylish accessories.
 I paired up Petal Pink and Pear Pizzaz Card stock with this pretty floral paper from the Best Dressed 6X6 DSP for this first card. Running the Pear Pizzaaz layer thru the big shot with the  Tufted 3D Embossing folder gave that layer a little dimension. A piece of vellum cut with the Stitched Nested Label Dies softens the back ground of the Petal Pink Die cuts of the shoe, perfume bottle and the little rose. I used Dimensionals to pop up both my vellum layer and my die cuts.

👛👜👛👜👛👜👛👜👛👜👛👜👛👜👛

 If you follow me, you know that I am a fan of the 3D favor type dies and I could not resist this adorable purse die that comes in the Dressed to Impress Bundle - it is the All Dressed Up Dies.  The purse goes together pretty easily with out much instructions needed.  I have seen several different variations on how to attach the handles.  Just remember to use your bone folder to condition the cardstock so that it can bend easier. I used Heather Heather cardstock, cut with the dies and then I ran it through the same Tufted 3d Embossing folder as the card above. I used Silver Foil for the buckles and buttons. I just tucked some small scrap pieces in the pocket for some contrast, so you could see the pocket better in the photos.
💜💜💜💜💜💜💜
For the perfume card:
  • the base is Basic Black Cardstock measures  7 3/4" X  5 1/2"  and scored at  3 1/2"  so that the back of the card is longer than the front forming column down the side of the card 
  •  layer of the pretty purple floral DSP measures 3 1/4" X 5 1/4 " 
  •  silver square from the Silver Foil Sheets with the 2nd largest square Stitched Shapes Framelit Dies  
  • I stamped the perfume bottle , several roses and the sentiment  on Purple Posey CardStock with black ink and cut them with the dies in the bundle.
  • I stamped several roses on Highland Heather with black ink and cut them with the dies.
  • Inside the card is a   3 1/4" X  5 1/4" piece of Whisper White Card stock for stamping any sentiment on.
  • Once I adhered the white inside of the card in - I lined up the die cut roses along the edge that shows when the card is closed and adhered them with liquid glue.
  • I used the newWhisper White 1/4" Crinkled Seam Binding Ribbon which is found on page 25 in the new Mini Catalog (with the Poppies Suite) Placing this across the purple layer before I adhered it to the black layer so that I could tuck the ends under the purple layer.  I tied a double bow and adhered that with a glue dot. 
  • the perfume bottle and the sentiment were popped up with Dimensionals.
  • added a few Basic Rhinestones just for a bit of extra glam
I hope you like these two cards and the adorable purse!
I have a retreat coming up in which I need to do a favor for each of the girls - So I think I will be making more of these purses! I feel some lipstick cards in my future as well!
As I mentioned in the top of this post - Stampin' Up! is celebrating their best sale of the year - Sale -a Bration.  I have links to both the new Mini Catalog and the Sale-A Bration catalog on my side bar.
Click on these to delve into all of the new offerings in the Mini Catalog.  Then when you are done drooling over that catalog - click on the Sale-A Bration Catalog to see what you can get for free with every $50 order - there are also a few dies and bunches that are free with a $100 order.  This is truly the best time to shop.  These Sale-a -Bration items sometimes sell out - so be sure to order early.
In fact, I am predicting that the cute Bee paper in will go quickly!!!

You can shop in my online store 24/7 by just clicking on the store front.  If you order more that $35 worth of products and you use my January Hostess Code - I will send you a sampler of some of the new Designer Series papers from the Mini Catalog in the form of 6X6 pieces. 
Happy Shopping!!

Labels

#HoneyBeeStamps 3-d 3D 4th of july apple Autumn baby back to school Balloons Barbie baseball Beer card bees birthday Birthday card birthday cards black and white Blending blog hop bloom boat boho bows brown bear buckeyes buffalo check bunnies camping candles candy Card cards Carrot Cake celebrate Cheese board cherries chickens chicks christmas cinco de mayo Cocoa Bar color congratulations cookies copper cows craft room crafternoon crafts daffodils daisies decor drinks dsp easter easter basket eggs embossing encouragement fall farm Farmers Market father's day favor featured fern fireplace fish fixer flag flowers football friend frog garden get well giftwrap gingerbread Gnome goat golf graduation greenery Halloween hawaiian hearts hello herbs holly hop hugs hyacinths Italian Kayak kitchen ladybug Lake house leaves love luau Magnolia makeover mantel masculine card Masks Mother's Day cards natural nautical nesting newyear note Nutcracker Ohio State Paper Pumpkin party patriotic peach pears pets plaid Plants projects pumpkins quilt Rae Dunn rainbow recipe red white & blue remodel Renovation robin root beer sailboat Saleabration shabby chic shamrocks sheep slimline card snail mail snowflake spring sprinkling can squirr st patrick St Patrick's Day stamp set Stampin' Up Stampin' Up! Stamping Inkspirations Hop succulents summer sunflowers tablescape Taco tag thank you thanksgiving Thinking of you tiki hut travel Treat bag treat box tropical truck tulips valentines watermelon wedding well suited winter yellow yoga